Signing in, finding your way around, and setting Patrimoine up the way you read.
Sign in
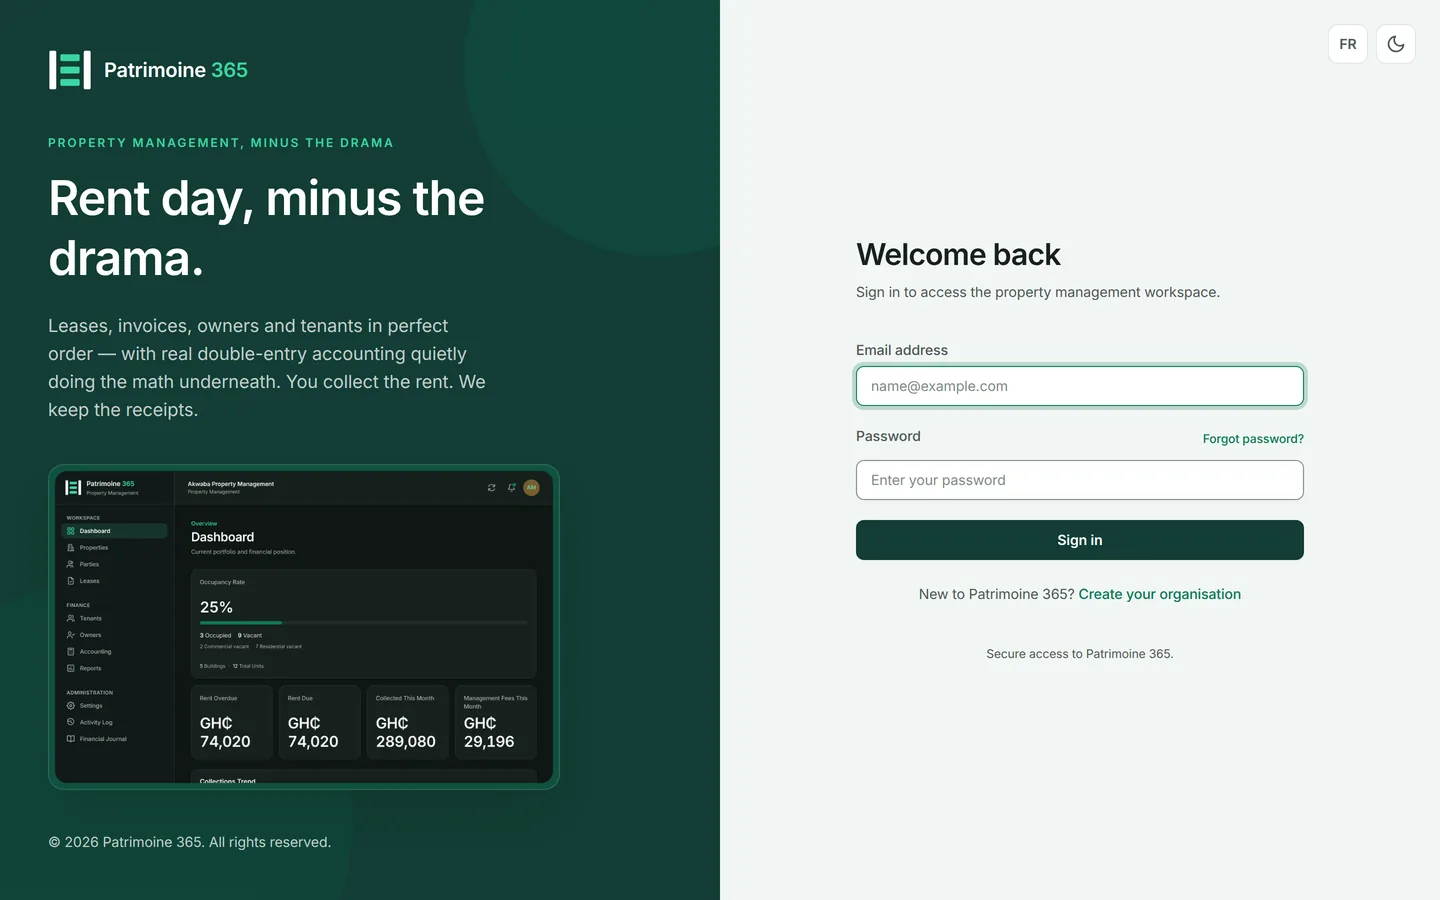
Every sign-in takes two things: your password, and a six-digit code sent to your email address. The code is asked for every time, not only on a new device.
1
Go to app.patrimoine365.com. Enter your email address and password, then press Sign in.
2
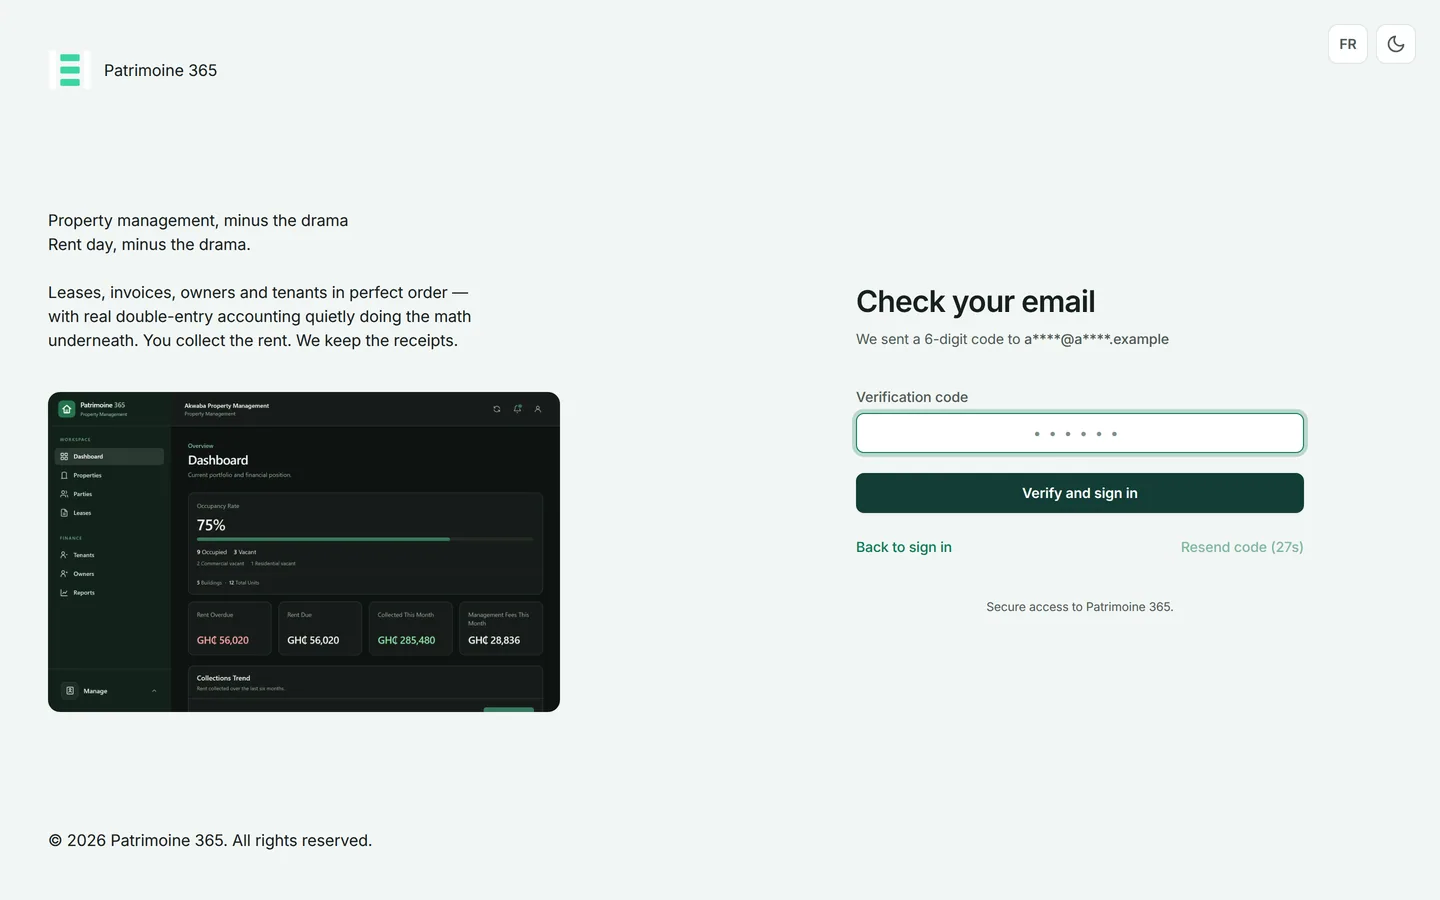
Patrimoine emails you a six-digit code. Open your inbox and copy it.
3
Type the code and press Verify. The code is good for a few minutes and for one sign-in only.
4
If the code has not arrived after a minute, press Send a new code. The previous one stops working the moment a new one is sent.
Check the spam folder before asking for a third code — repeated requests are throttled.
Then: You land on the Dashboard. Your session lasts until you sign out or close the browser.
Find your way around
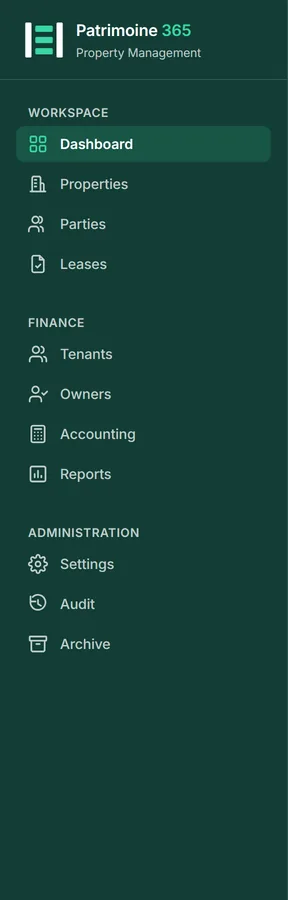
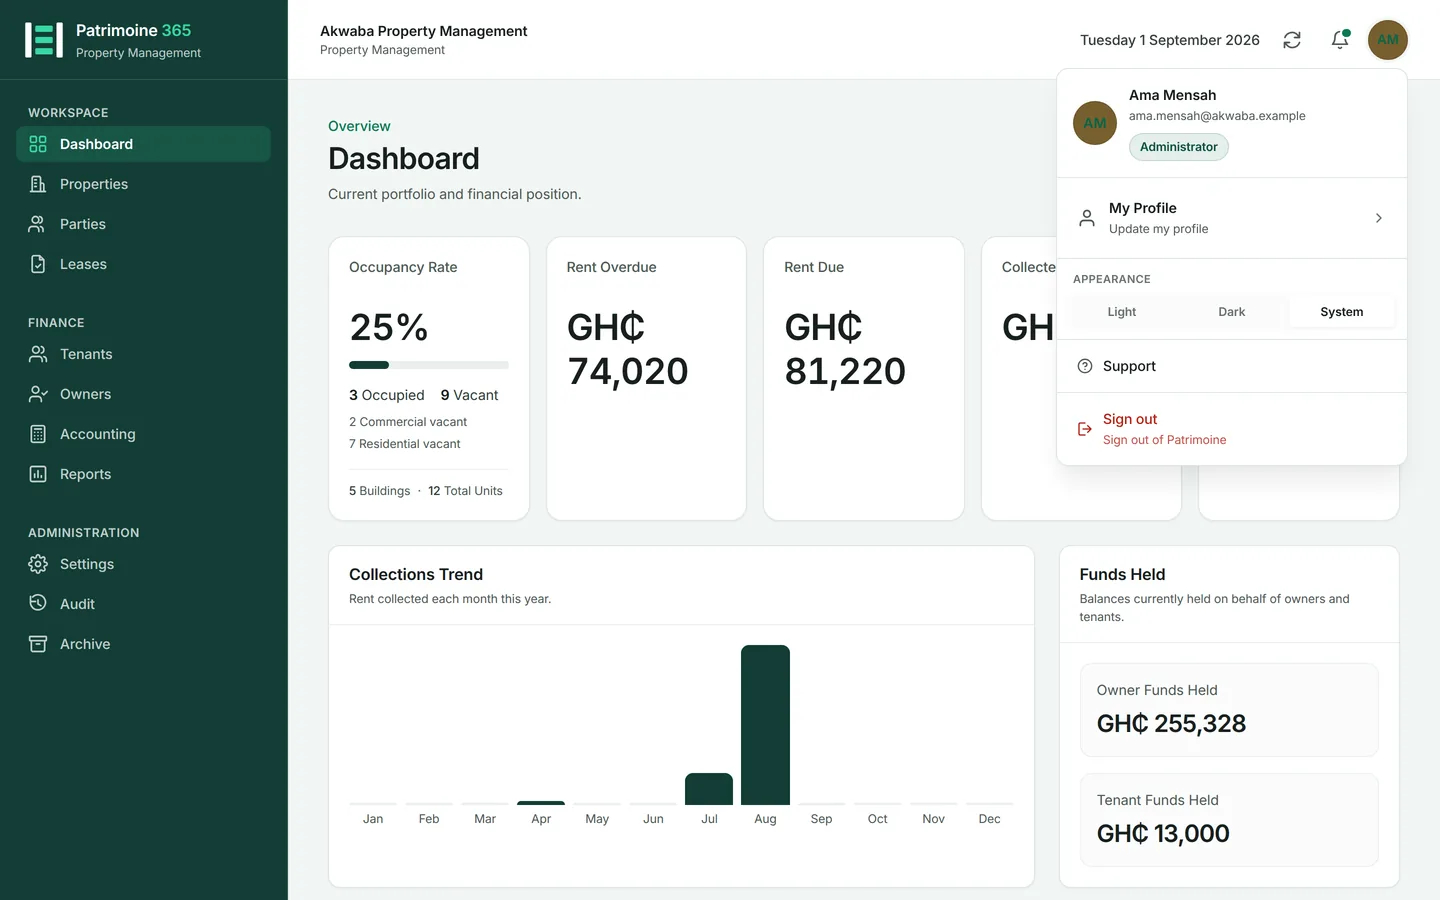
Everything is reachable from the sidebar on the left, which is grouped by what the work is rather than by what part of the software it belongs to.
1
Workspace holds the day-to-day: Dashboard, Properties, Parties and Leases.
2
Finance holds the money: Tenants, Owners, Accounting and Reports.
3
Administration holds the rest: Settings and Audit. It is visible to administrators only.
4
The top bar shows the organisation you are signed in to, today's date, the notification bell, and your own photograph. Press the photograph for your profile and to sign out.
Set the language and currency
Who can do this: Administrators
Both are set for the whole organisation, not per person, so that a document produced by one colleague reads the same as one produced by another.
1
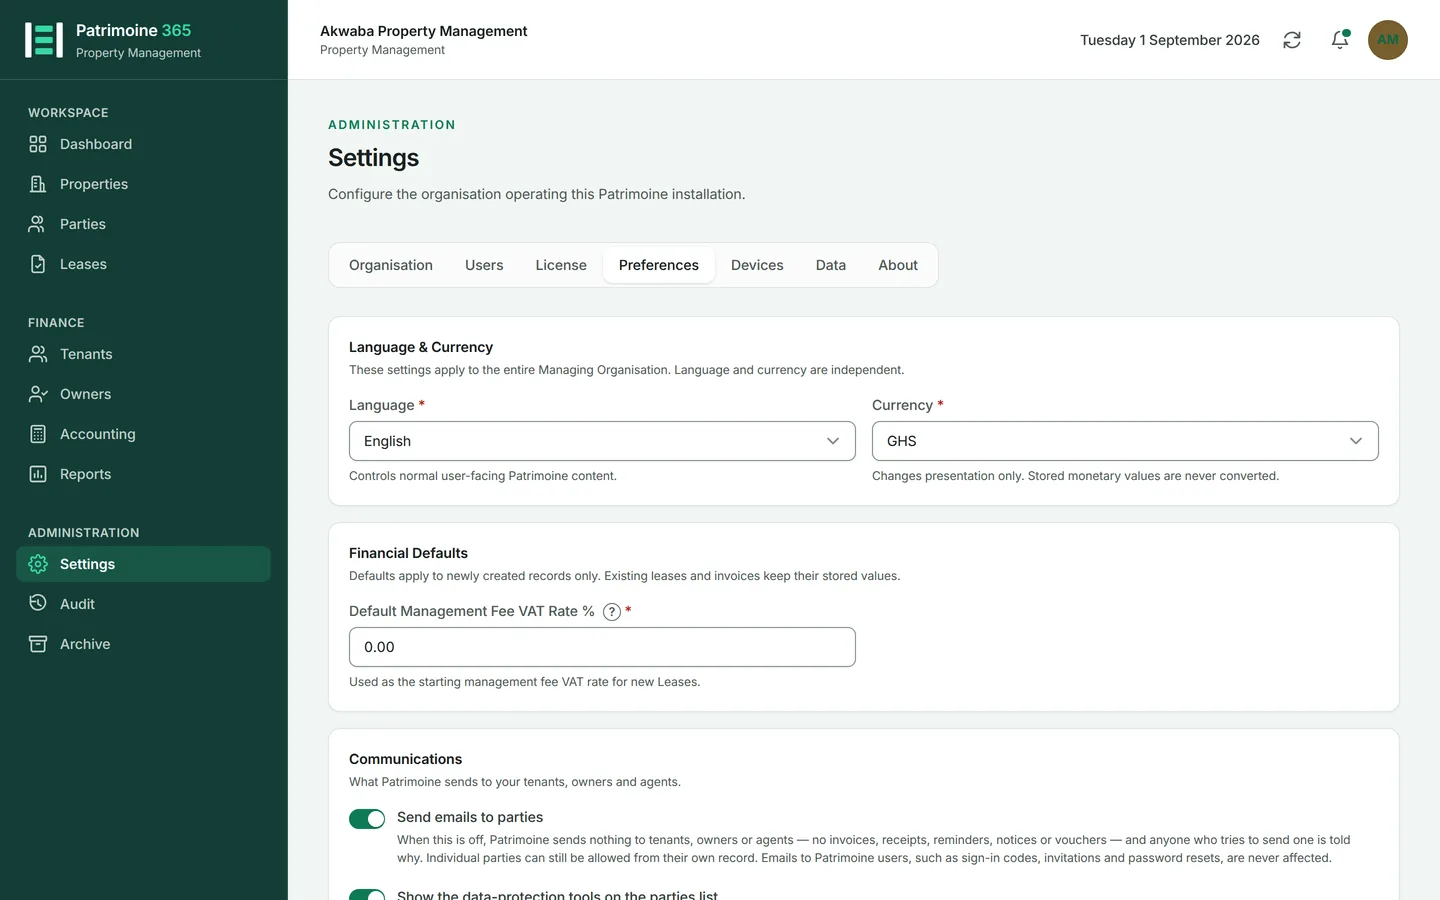
Open Settings from the Administration group in the sidebar.
2
Choose the Preferences tab.
3
Pick the language. English and French are both complete: every screen, every document and every email follows it.
4
Pick the currency and the default VAT rate. The currency decides how every amount is written, including the thousands separator.
5
Under Communications, three switches: whether Patrimoine emails your tenants, owners and agents at all; whether the data-protection tools appear on the parties list; and whether that list is ordered by surname. All three belong to the organisation, so a list read at two desks reads the same way.
6
Press Save. The screen changes language immediately; documents follow from the next one produced.
Switch between light and dark
Appearance is yours alone, kept in your browser. It does not affect colleagues and it does not affect documents.
1
Press your photograph at the top right.
2
Choose the light or dark setting in the profile panel.
3
The change is immediate and is remembered on this browser.
Add your photograph
Your photograph sits at the top right of every screen and beside your name on the Users page, so an administrator can tell accounts apart at a glance. Until you add one, your initials appear on a colour of their own.
1
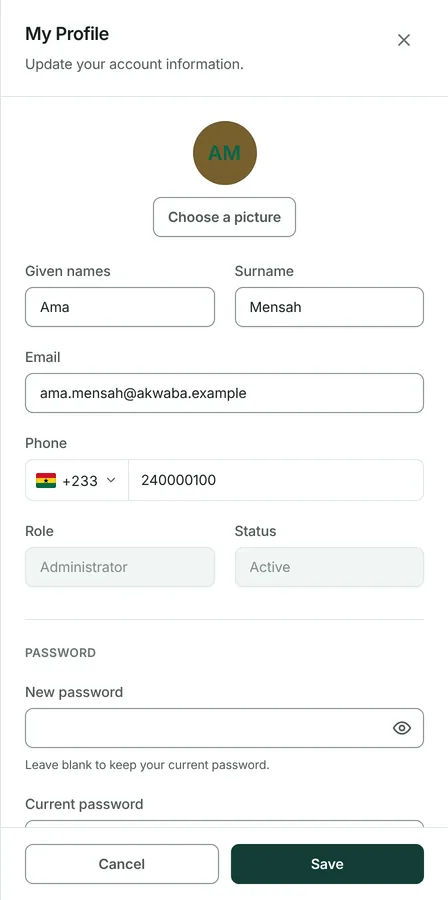
Press your photograph or initials at the top right, then Edit profile.
2
Press Choose a picture and pick a file. JPG, PNG, WEBP and GIF all work, and a HEIC photograph from an iPhone works in Safari.
3
Drag the picture inside the round window and zoom with the slider or your scroll wheel until it is framed the way you want.
4
Press Save. To change the framing later, press Reframe — it reopens the picture exactly where you left it, so you do not need the original file again.
Change your sign-in email
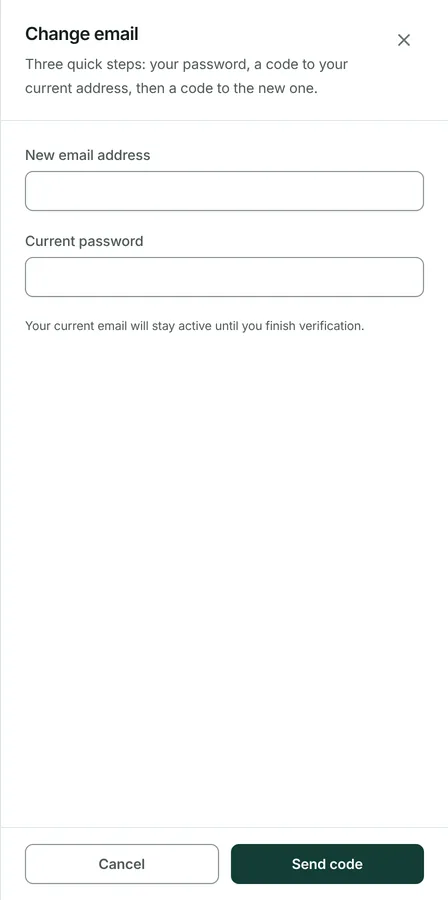
The address you sign in with also receives your sign-in codes and password resets, so changing it takes three short steps: your password, a code sent to your current address, and a code sent to the new one. Your current address keeps working until all three are done.
1
Press your photograph or initials at the top right, then Edit profile.
2
Press Change email beside your address.
3
Enter the new address and your password, then press Send code. A six-digit code goes to your CURRENT address, naming the new one so you can see exactly what you are approving.
4
Enter that code. A second, different code then goes to the NEW address to prove the mailbox is yours.
5
Enter the second code. The address changes, every device is signed out except this one, and a confirmation is sent to your old address.
Then: Each code lasts ten minutes and can be re-sent a few times. If you can no longer open your old mailbox at all, write to support from Settings — the platform team can help after verifying it is really you.
Read a long list
Any list longer than 25 rows is shown a page at a time.
1
The line at the foot of the list says how many rows are on screen out of how many exist.
2
Press a page number to jump straight to it. The page you are reading is the filled one.
3
Change Rows per page to 25, 50 or 100. Your choice is remembered for that list on this browser.
4
Searching or filtering returns you to the first page, so a match further in cannot hide behind a page number.
See where you are signed in
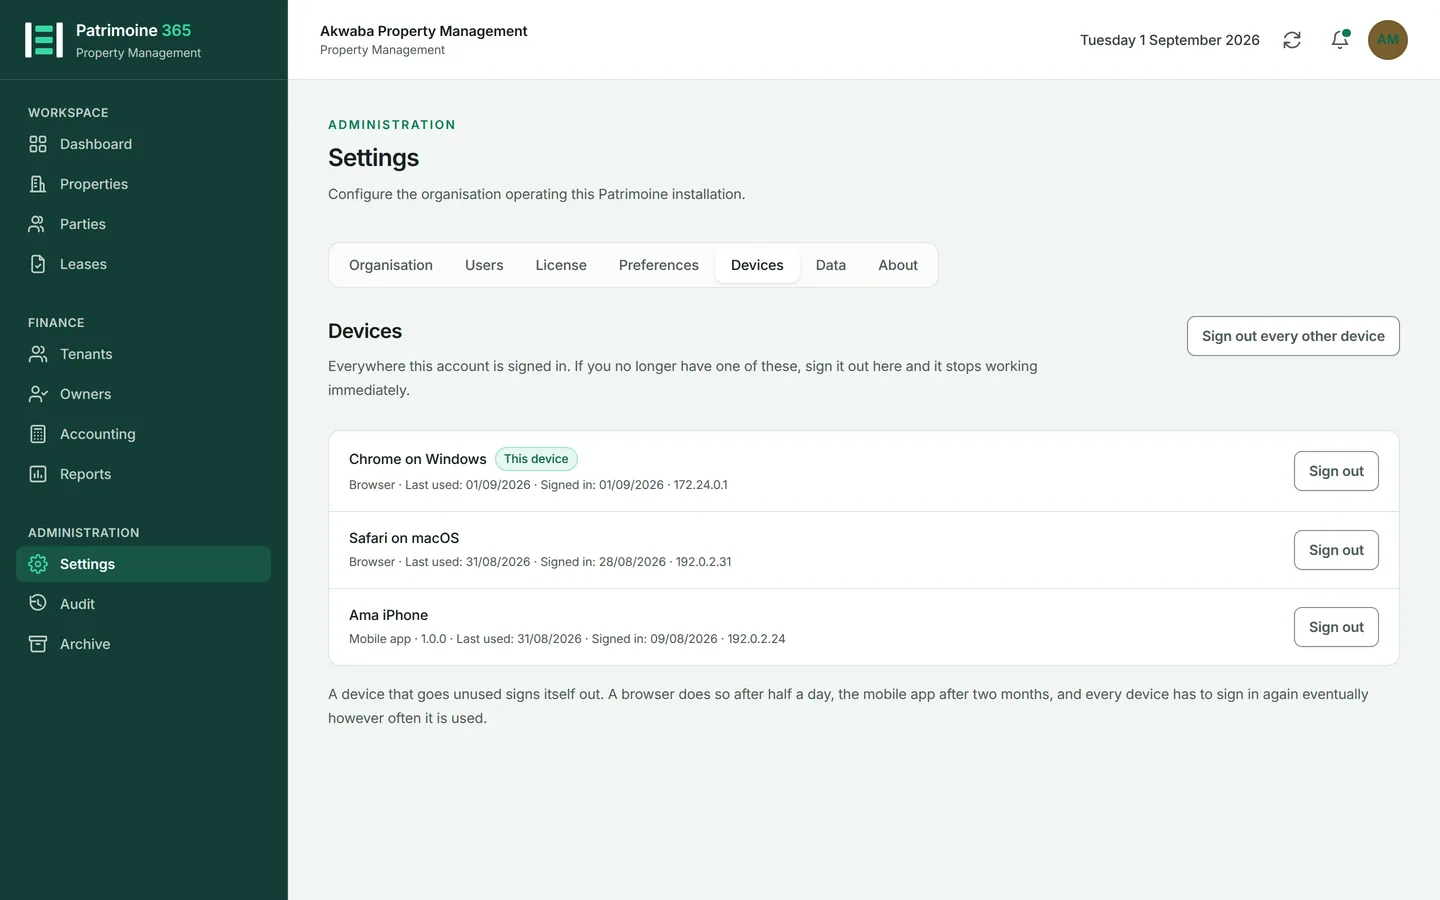
Settings keeps a list of every device your account is currently signed in on. If one of them is a phone you no longer have, you can take it out of the list yourself and it stops working immediately.
1
Open Settings and choose the Devices tab.
2
Each row names the device, when it was last used and where from. The one you are reading this on is marked This device.
3
Press Sign out beside a device you no longer recognise. It cannot reach your organisation again without signing in from the start, code included.
4
Sign out every other device does the same to all of them at once and leaves you signed in here.
Then: A device you stop using signs itself out on its own — a browser after half a day, the mobile application after two months — and every device has to sign in again eventually however often it is used.
Ask us for help
Support, the guide you are reading, the error codes and the update log are all on one page, reached from your own photograph at the top right.
1
Press your photograph at the top right and choose Support.
2
The page opens on Contact support. Write what you were trying to do and what happened instead, then press Send to support.
3
If a message carried a code beginning PM-, put it in. It tells us exactly which refusal you met without a description of the screen.
4
Your name, your organisation and the address we answer are taken from your account, so there is nothing else to fill in. We reply by email.
5
The other tabs on the same page are the guide, the full list of error codes, and what changed in each release.
Then: Anybody may write to us — a Viewer who cannot do their work needs to say so as much as an administrator does.
Understand who can do what
Patrimoine has three roles. They are fixed: what each one may do is the same in every organisation.
1
An Administrator can do everything, including Settings, Users, the Licence and both tabs of Audit.
2
A Property Manager does all the day-to-day work — properties, parties, leases, payments, owners and reports — and may delete records, but cannot reach the Administration group.
3
A Viewer can read and can export reports, and can change nothing.
4
Controls a role may not use are not merely disabled, they are not shown. The server enforces the same rule, so a hidden control cannot be reached another way.